

Images now dominate the social landscape, particularly notice the change to increased image size this past year on Facebook, LinkedIn and Google+.
WHY? We are drawn to images, and images tell our story. So how can you easily add photos to your blog posts? Check out these simple steps.
- Choose a Photo
You can either use your own original photos or you can buy a photo from a stock photo site where you are granted permission to publish stock images in exchange for a fee. I discourage you from grabbing photos off the internet that you do not have permission to use, first off it is illegal and second just so you know, you are infringing on intellectual property through copyright.
Here are a few sites I recommend for getting some great stock images: Always acknowledge where you got the photo in the “caption” section after you upload your image.
Generally these companies offer a discount the more images you purchase so if you buy a pack and if you plan to blog with consistency which I recommend you do, than buy a package. When you actually download an image, only download the “web” version. It is less expensive and a lower resolution image which is all you need for the internet. Higher resolution images are for print materials. Once you purchase that image you can re-use it if you wish, so for example you may want to add text on a previously used image if it applies to another post or use it on your social media sites.

from photos.com
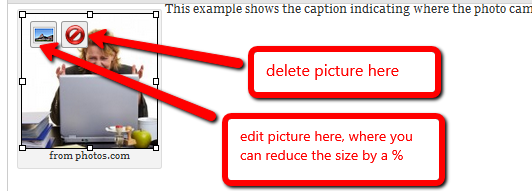
This example shows the caption indicating where the photo came from and the image size is a “Thumb Nail” sized at 150 x 150 pixels.
- Upload Image & Choose Size
After you purchase your photo and have saved it to your computer,( I suggest you keep a folder called Clip Art Purchased or something like that) than you will want to choose a size that will work best in your blog post. First step is to use the “Featured Image” button to place your primary image at the top of your post.

You can adjust the size if you want by grabbing the corners of the image and making it larger or smaller, but using this function placed your image in the exact place you put your cursor before inserting the image.
You can choose a thumb nail size (which is in the example above) at 150 x 150 pixels
which is a pretty typical size in most posts. Second option is to choose a medium size which usually is 300 x 200 pixels, or the full size of whatever you uploaded your photo as. Sometimes it takes some playing around with to get the size that works in your post. If you are using wordpress as your blog platform, then you will see how easy it is to delete or edit your image in the illustration below. You can also drag the corners of your image to increase or decrease the image size.
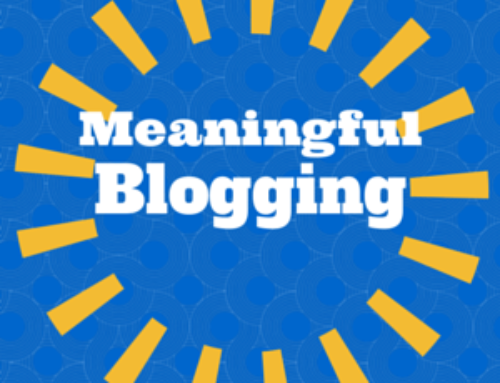
- Add Text To An Image
Adding text to an image can enhance your message and is simple if you know the tools to use! I like to use a free photo editing tool called “Pic Monkey”. This tool lets you edit the size of the image and add text as well as other embellishments to your image. You easily upload your image from your computer into the Pic Monkey editor and away you go with creating custom message for your image such as you see in the image below. If you have graphic skills you may have graphics programs such as Photoshop or Illustrator that will allow you to edit your images.

www.photos.com
Typically adding one photo to your blog post is enough but it also depends on the business you are in. As an example if your business is filled with visuals such as fashion or food than it may take multiple images to tell your story.
So go out and create your perfect blog post and share it with me on my Facebook page or send me a link on Twitter!